Do you want to be a professional DJ, mix your songs and have your own radio station? TikiLIVE offers you the possibility to live radio broadcast and have your own white label website.
All you need to do is install Virtual DJ application on your computer (http://www.virtualdj.com/) and go live on your radio station. The settings described in this page are for both Virtual DJ versions: Free and Pro. Virtual DJ is available for download for both Windows and Mac operating systems.
Important note: We have confirmed that using Virtual DJ version 7 the users can stream on their radio channel. Latest Virtual DJ versions are under testing and we will post them in this page once we confirmed that they are working with our platform.
Virtual DJ application offers you the possibility to broadcast your songs playlist and also to stream your microphone.
Note: before installing Virtual DJ application we recommend you to read the hardware requirements first.
The first thing you need to do is to view the broadcast settings for Virtual DJ from your account dashboard:
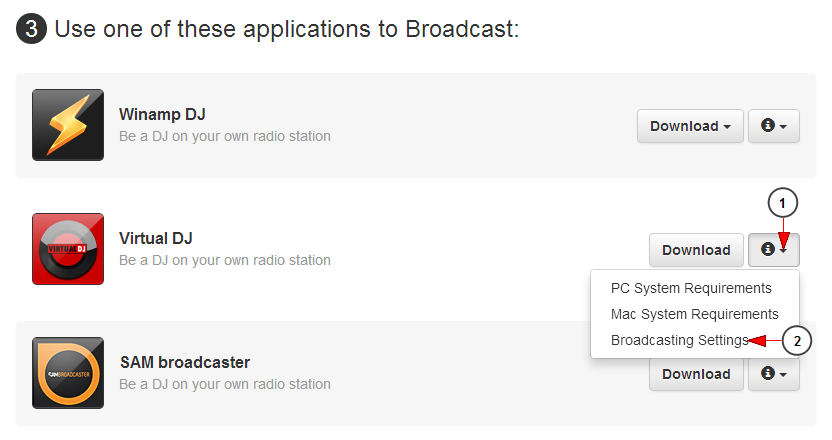
1. Click here to open the drop-down menu.
2. Click here to view the broadcast settings for Virtual DJ.
An overlay window will be displayed and you can view the settings you need when configuring Virtual DJ application in your computer:
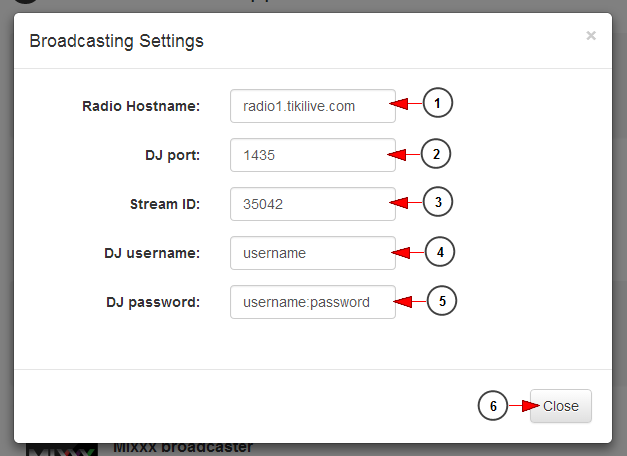
1. Here you can see the radio host-name.
2. Here you can see the DJ port number.
3. Here you can see the stream ID.
4. Here you can see the DJ username.
5. Here you can see the DJ password.
Note: the DJ credentials are the ones you insert when you create a new radio channel. The username and password can contain only letters, numbers and dashes (a-z/A-Z/0-9 -).
6. Click here to close the overlay window.
With this information, you will be able to set up the Virtual DJ program to allow you broadcast right to your TikiLIVE radio channel:
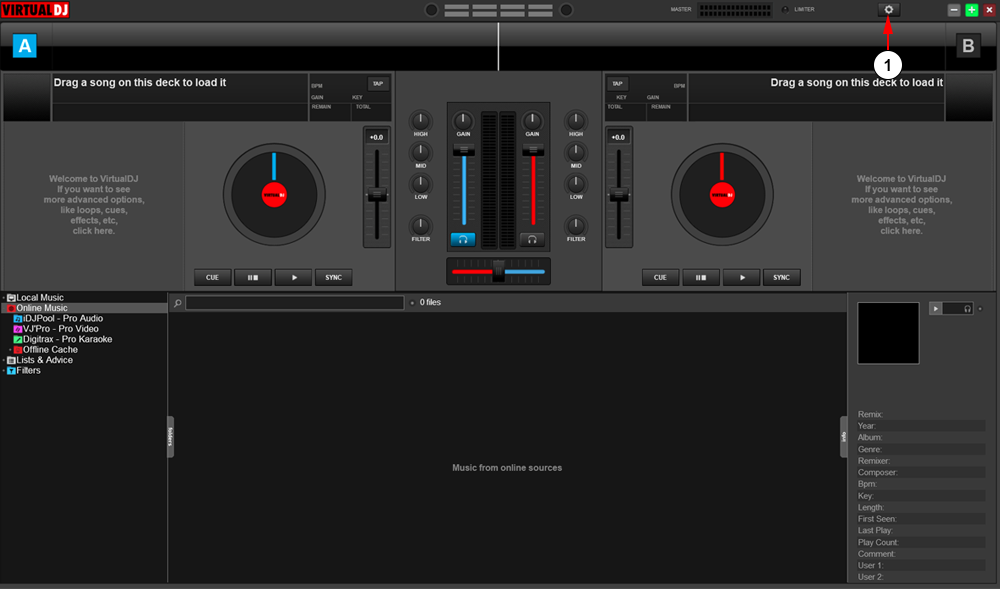
1. Click the settings icon at the top of the window.
The settings menu will appear:
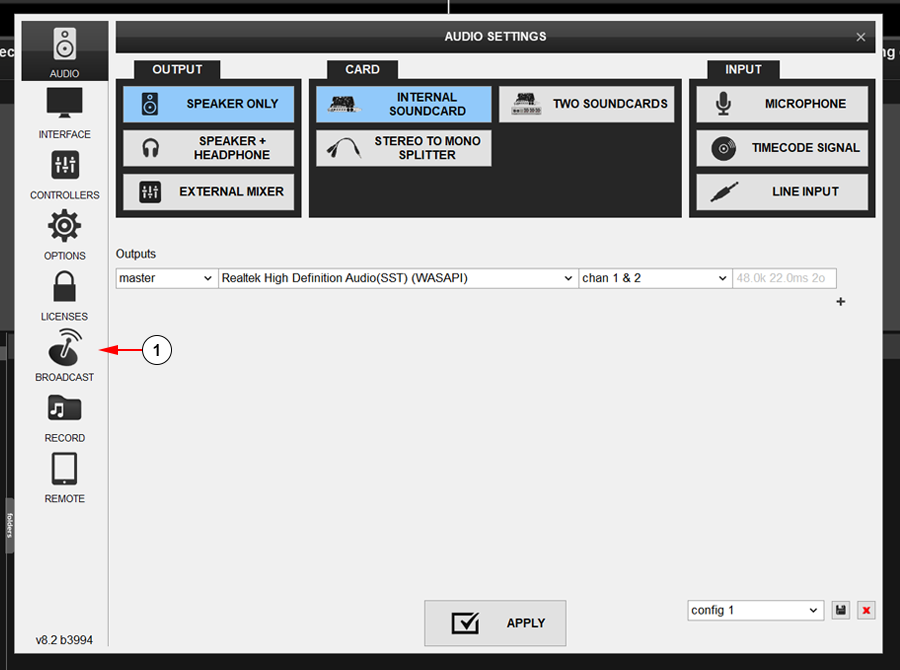
1. Click the Broadcast section to open the settings.
Here you can configure your broadcasting settings:
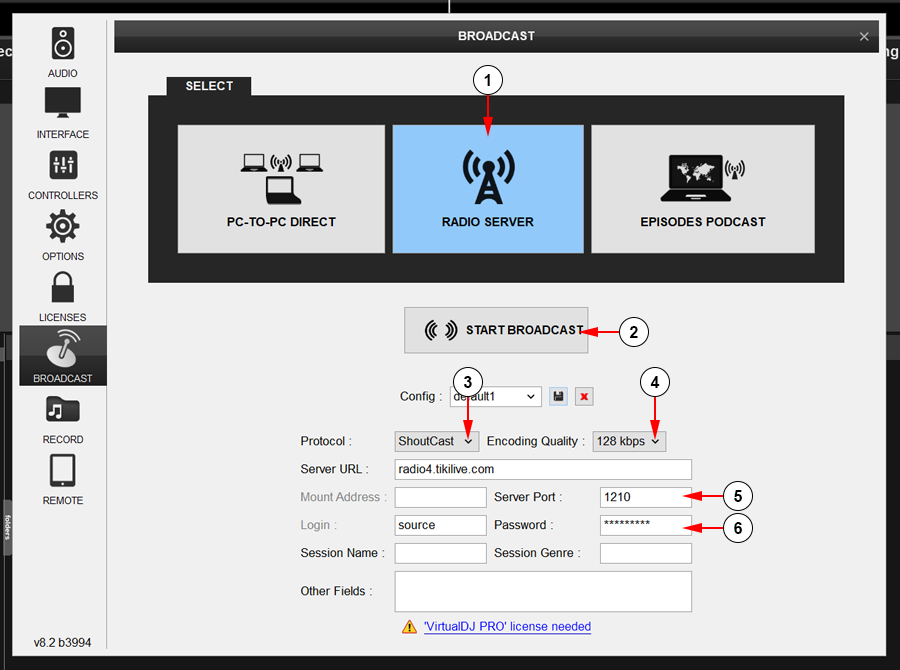
1. Click the button here to setup a radio server.
2. Click here to start a broadcast.
Note: You will need a Virtual DJ Pro license to broadcast live.
3. Make sure the ShoutCast option is selected from the drop down list.
4. Select from the drop down list the encoding quality you wish to broadcast at. This will also be determined by your Internet connection quality.
5. Insert here your server port from your Broadcast Settings.
6. Insert here your password from your Broadcast Settings.
Note: This will be a combination of the DJ username and DJ password set from your radio channel settings. For example, if your DJ username is ‘demo’ and your DJ password is ‘1234’ then your actual DJ password will be ‘demo:1234’
Broadcast your songs playlist
Once the application is installed and configured to broadcast, you can stream music from your computer.
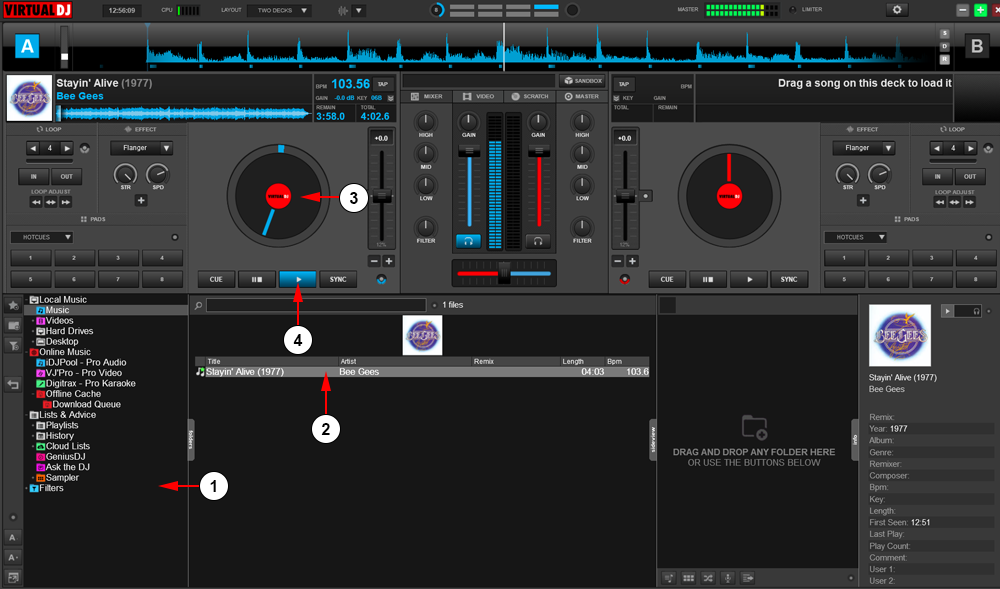
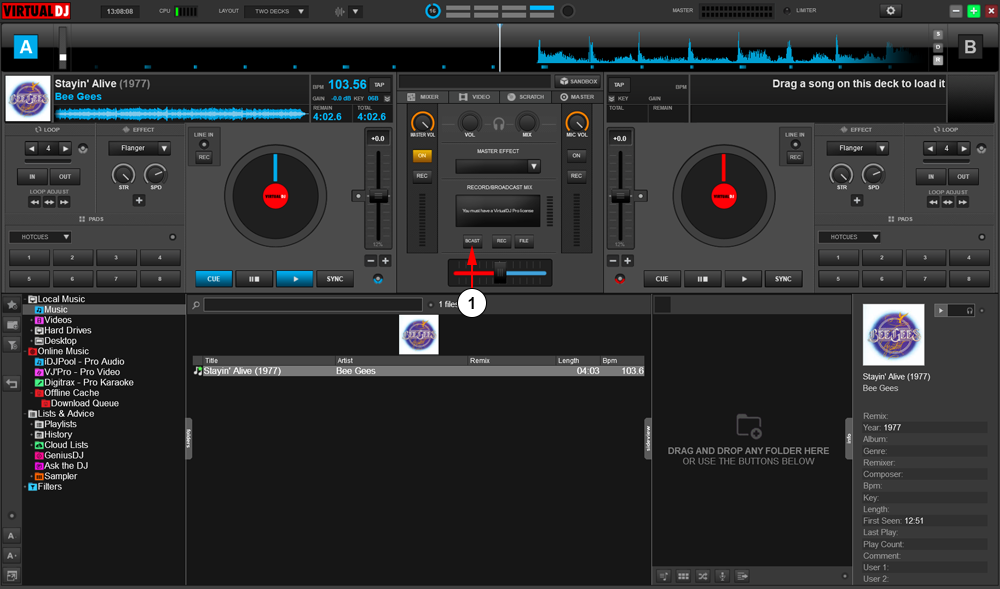
1. Click here to browse for audio tracks on your computer.
2. Click on the file and drag it into the desired deck.
Note: there are two available decks which you can use for mixing songs. You can drop the file wherever you want.
3. Drop the file on the desired deck.
4. Click the play button to start broadcasting the song.
Note: the song will start playing on your radio channel. When streaming with Virtual DJ the song cover will not be displayed on the radio channel page, (the radio thumbnail is displayed) only the song title and artist will be displayed.
Below you can see an example of mixing two songs at the same time:
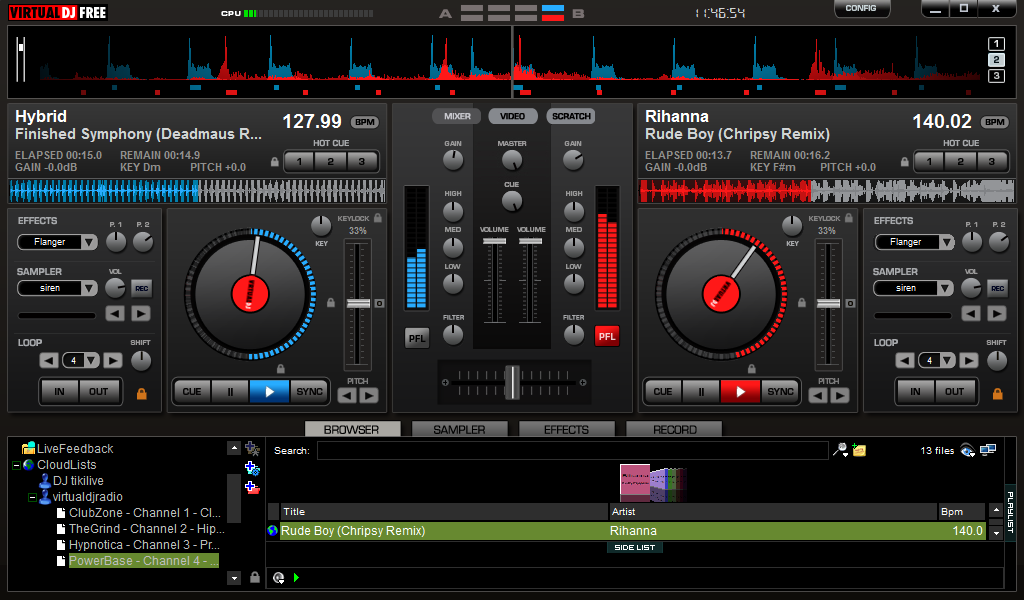
As you can see in picture above, a song is playing on the left deck and a different song is playing on the right deck. The songs mix will play on you your radio channel.
Stream your microphone
To configure your microphone, click on the settings button on the header bar:
1. Click the settings icon at the top of the window.
The settings window will appear where you can configure your microphone settings:
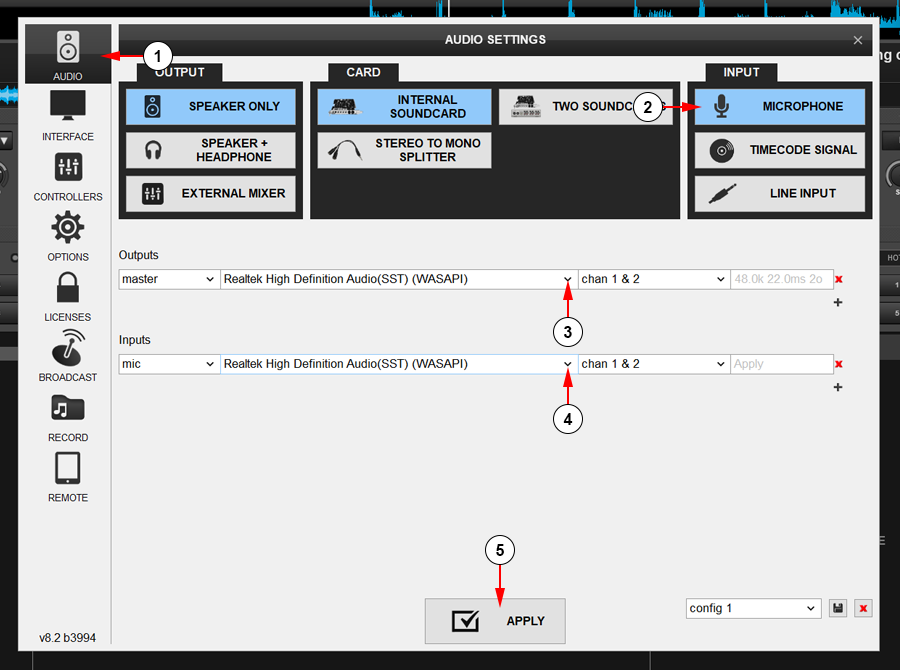
1. Click on the Audio section here.
2. Click the microphone input option here.
3. Select from the drop down list your output speakers.
4. Select from the drop down list your input device. This will be your microphone.
5. Click the button here to apply your settings.
Once your microphone is enabled, you can start broadcasting:
1. Click here to start broadcasting.
Note: when streaming with Virtual DJ the cover of the song is not displayed on the radio page. We show song thumbnails only when playing songs uploaded on our server. Broadcasting with Virtual DJ will show the default radio thumb.