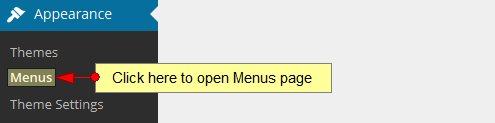
The Menus page enables a user to create custom navigation menu in place of a theme’s default. In order to manage WordPress menus, click on the Menus link, under Appearance menu:
Once the page opens you can create a new menu:
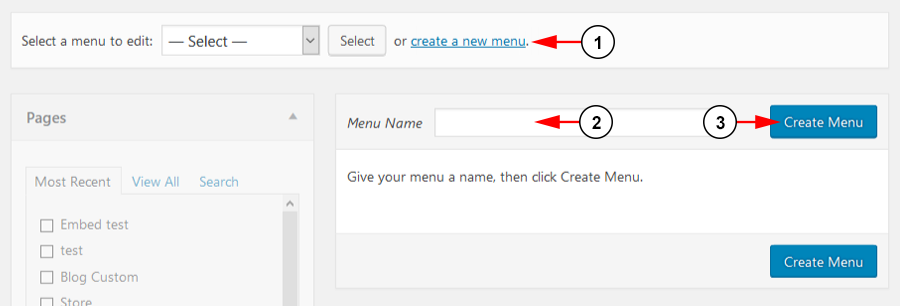
1. Click on the link to create a new menu.
2. Insert here the menu name.
3. Click here to create the new menu.
You can also edit the existing menu and customize it with pages, links or categories:
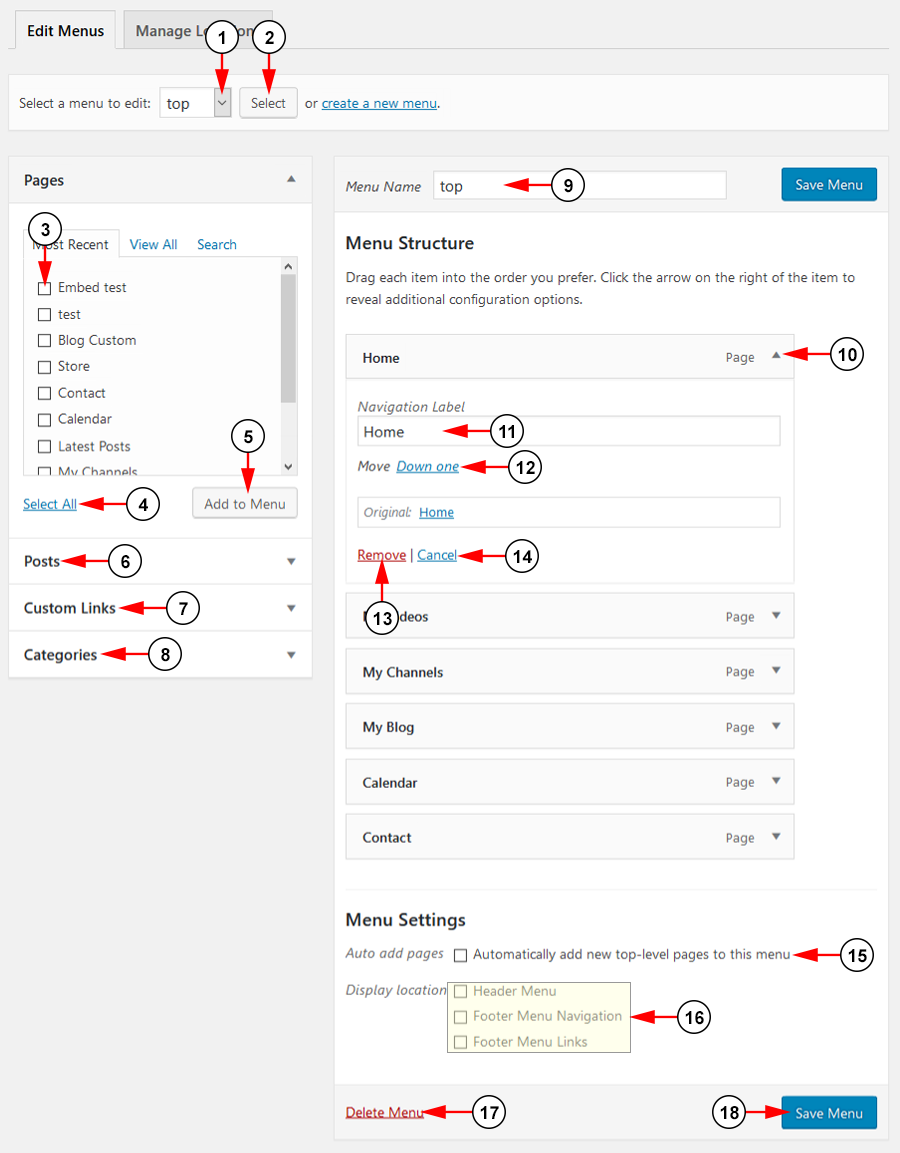
1. Click on the drop down list to choose the menu you want to edit.
2. Click here to select the menu you want to edit.
3. Check the box of the page you want to add the item to the menu.
4. Click here to select all pages.
5. Click here to add to the menu the selected pages.
6. Click here to add a post link to the menu.
7. Click here to add a custom URL link to the menu.
8. Click here to add a category link to the menu.
9. Here you can see and edit the menu name.
10. Click here to view or hide the page settings section.
11. Here you can add a label for menu link page.
12. Click the link here to move the menu link down in the order by one.
13. Click here to remove the link from the menu.
14. Click here to cancel editing the menu link.
15. Check the box to add new top-level pages automatically.
16. Select an option of where you would like the menu to be displayed on your site.
17. Click the link to delete the menu.
18. Click here to save the menu.
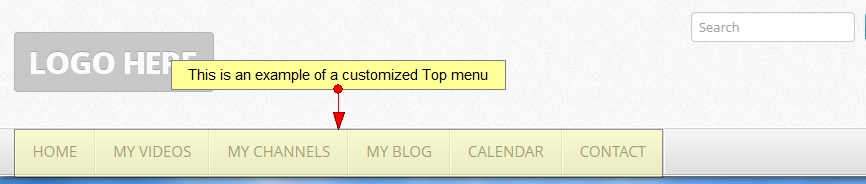
Below you can see an example of a customized Top menu: