Warning: autorecording must be always ON on TikiLIVE if someone uses 3rd party broadcasters and wants to record their live session with TikiLIVE.
Using XSplit you can broadcast on your channel the video feed from your webcam and you can also add videos, images and text while streaming.
Once the application has been successfully installed you must follow the below steps to go LIVE with XSplit.
When the application first launches, you will need to login:
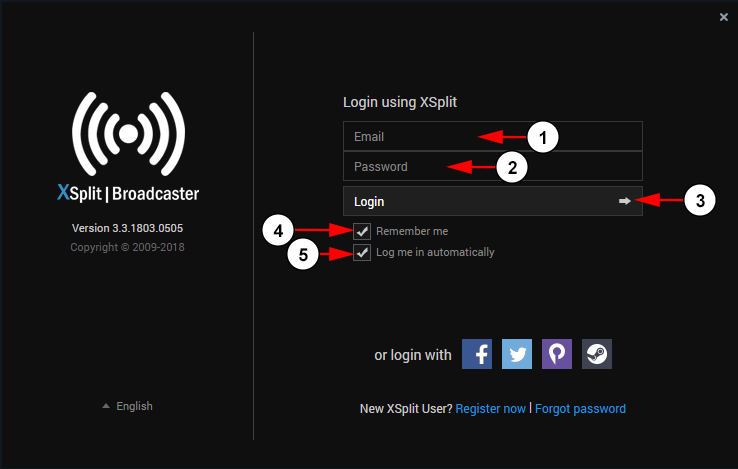
1. Insert here your email address for XSplit.
2. Insert here your password for XSplit.
3. Click the button here to login.
5. Check this box if you want your username an password to be saved on the application, so next time you will not need to re-enter them.
6. Check this box if you want to be logged into the application automatically when you launch XSplit.
The application will launch and you will have access to the broadcaster:
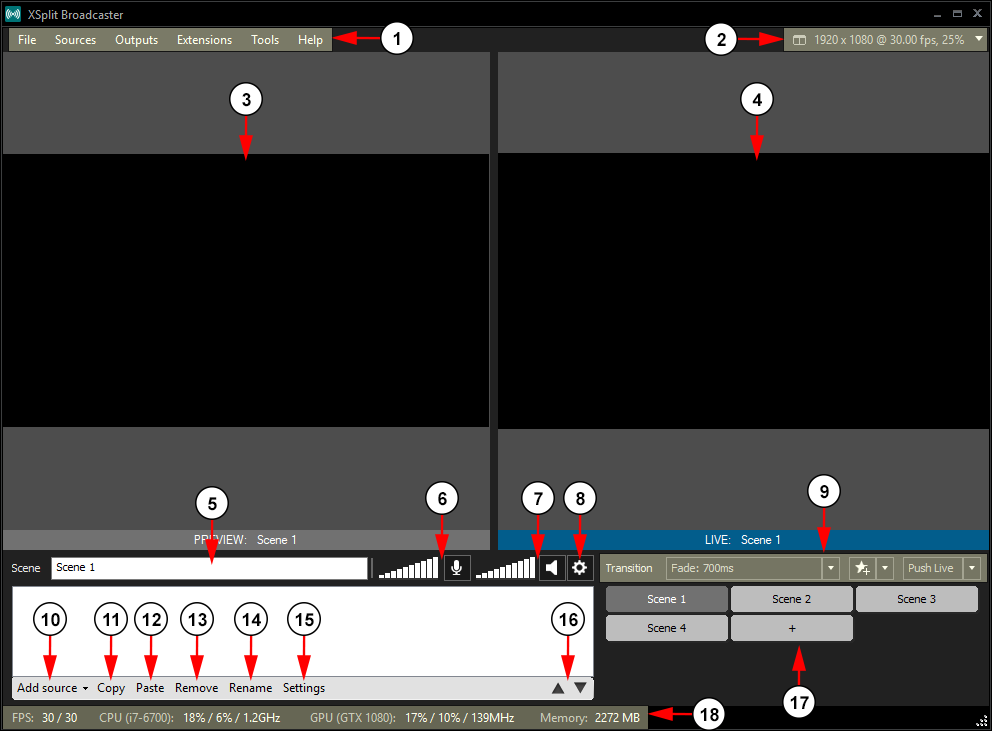
1. Here you can see the menu options.
2. Click here to adjust your stream resolution options.
3. Here you can see the preview window for your stream.
4. Here you can see the live window for your stream.
5. Here you can change the name of your scene.
6. From here you can adjust the microphone volume.
7. From here you can adjust the speaker volume.
8. Click here to edit your audio settings.
9. From here you can adjust your transition settings between scenes.
10. Click here to add a new source: camera, video, image, text, etc.
11. Click here to copy a source.
12. Click here to paste a source.
13. Click here to remove a source.
14. Click here to rename a source.
15. Click here to adjust the settings of a source.
16. Click here to move a source up or down within a scene.
17. Click here to select your scenes.
18. Here you can see the specifications for your computer through XSplit.
In order to start broadcasting LIVE, you will need to make add broadcast settings. Click on the Outputs option and select the Set up a new output option:
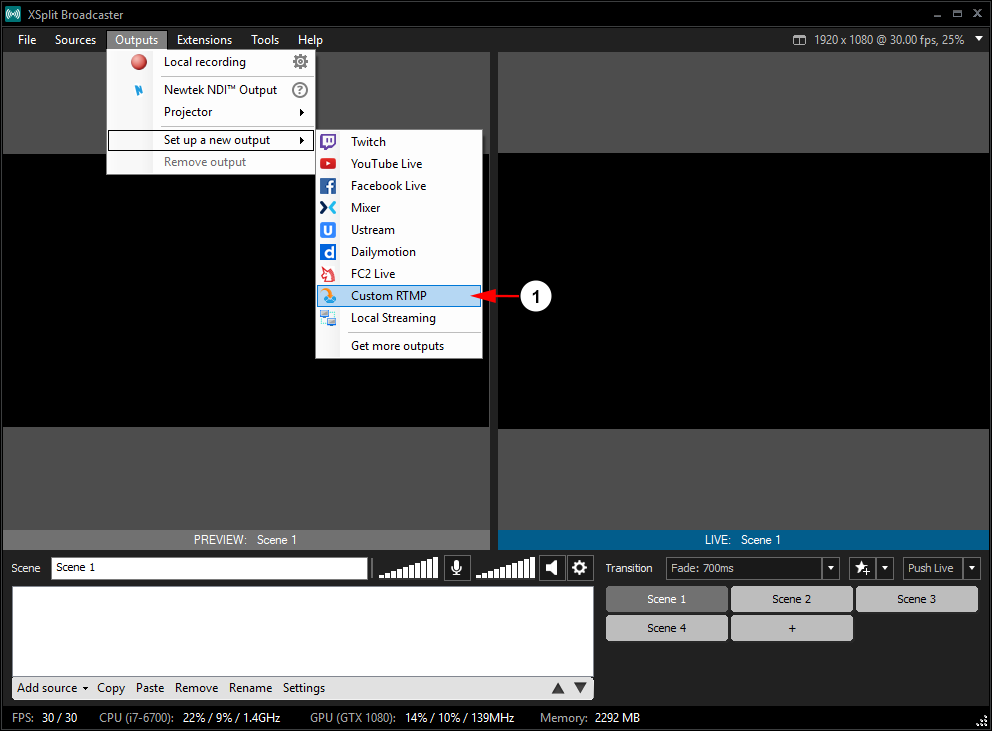
1.Click Custom RTMP to set up streaming to your TikiLIVE channel.
The Custom RTMP Properties window will open:
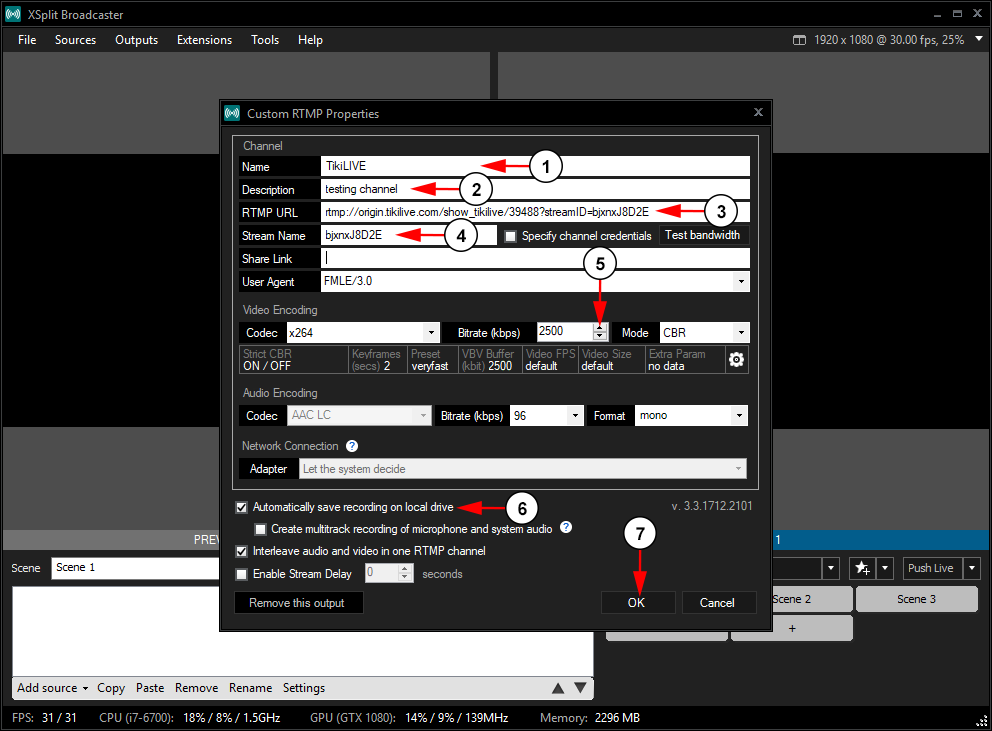
1. Enter here the name for this channel.
2. Enter here the description for this channel.
3. Enter here the RTMP URL for your channel.
4. Enter here the Stream Name for this channel.
5. From this drop-down menu you can select the quality of the stream.
6. Check the box here to automatically save recordings to your computer.
7. Click here to save the channel settings.
The new streaming option will appear in the outputs menu where you can start the broadcast:
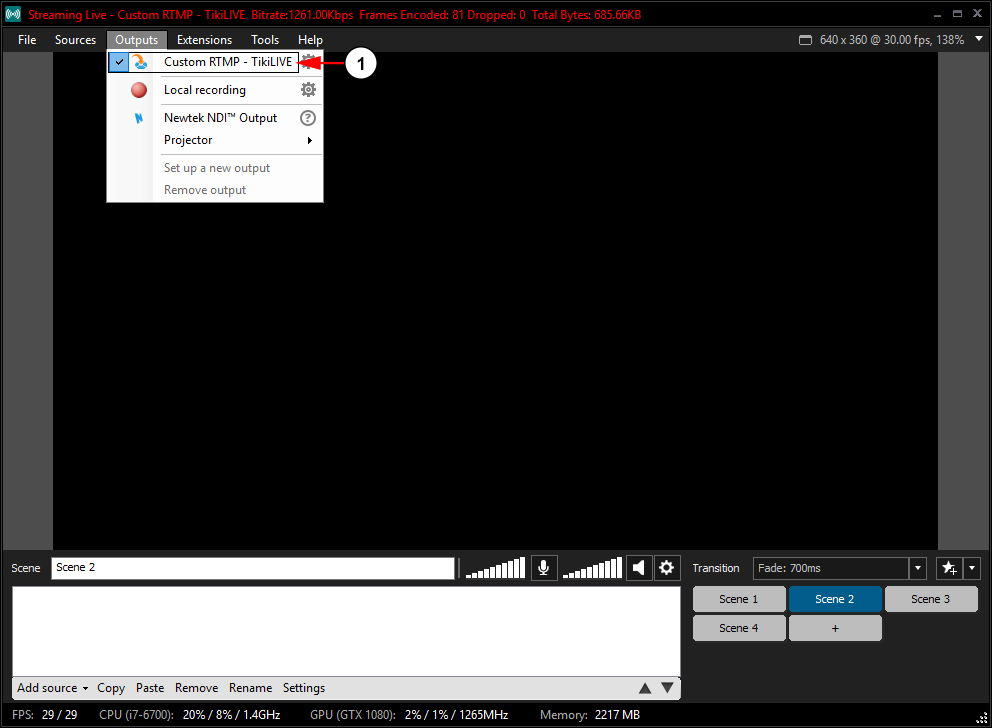
1. Click the stream setting here and your broadcast will begin.