Warning: autorecording must be always ON on TikiLIVE if someone uses 3rd party broadcasters and wants to record their live session with TikiLIVE.
Once the application has been successfully installed you must follow the below steps to go LIVE with VidBlasterX:

1. Here is the menu for the broadcaster.
2. Here you can see the preview window for your stream.
3. Here you can see the live window for your stream.
4. Here is the transition windows that will allow you to switch between scenes.
You can add sources to the broadcaster as shown below:
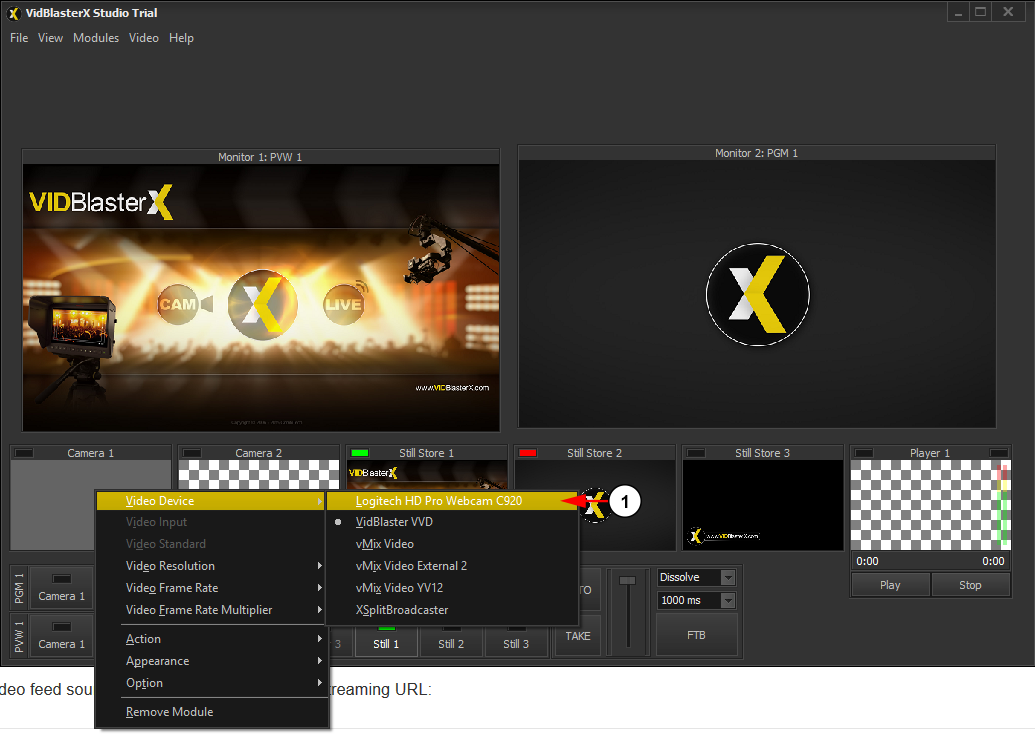
1. Right click on a module, hover over Video Device, and selected your source.
In order to setup your channels to play through VidBlasterX, you will need to make sure the Streamer module is enabled:
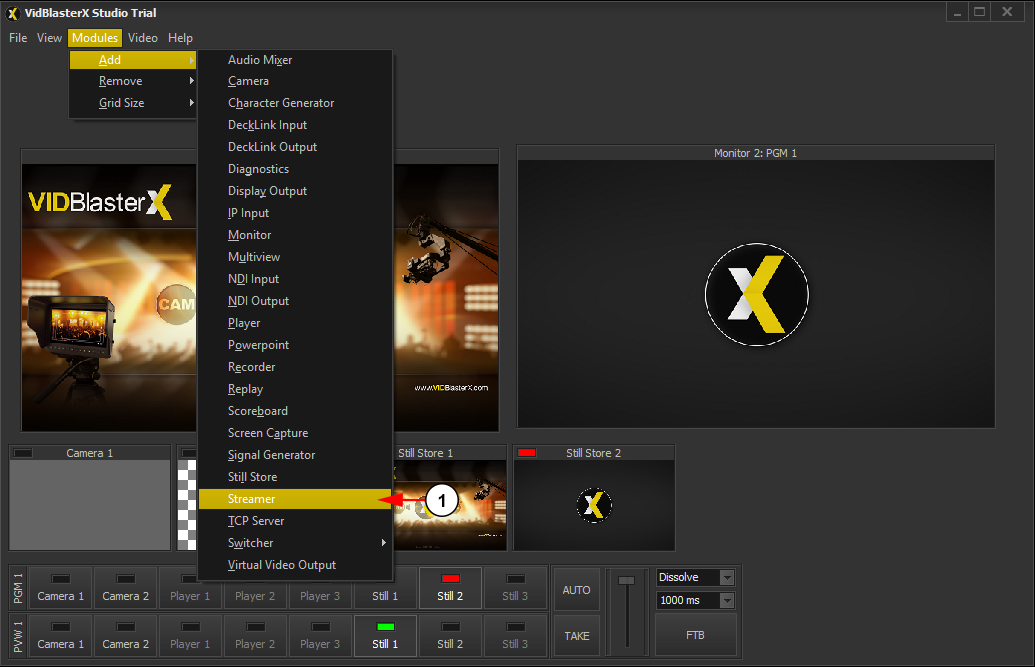
1. In the top menu, select Modules, then Add, then make sure Streamer is selected.
After you have set the video feed source, you need to set the server settings:
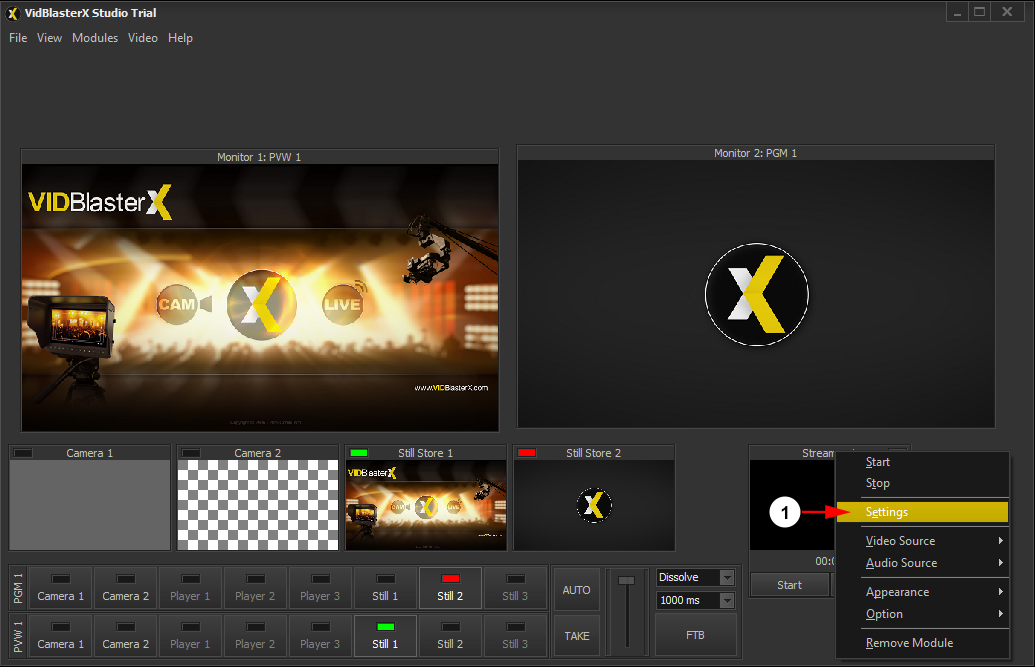
1. Right click on the Streamer module and click on Settings.
In the Settings Streamer window that opens, you will be able to insert your channel broadcasting details:
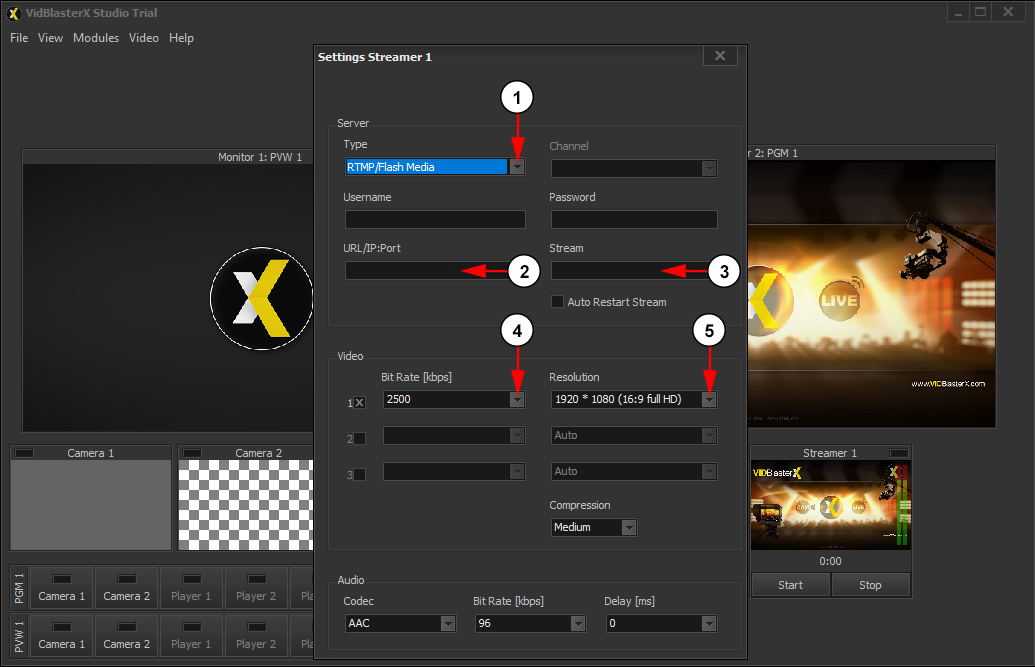
1. Make sure that RTMP/Flash Media is selected from the Type drop down menu.
2. Insert here the Streaming URL from the Broadcast Settings page.
3. Insert here the Stream Name for your channel.
4. Choose the bit rate from the drop down menu for your stream.
5. Choose the resolution from the drop down menu for your stream.
After you have performed all the steps, you will need to click on Start broadcast:
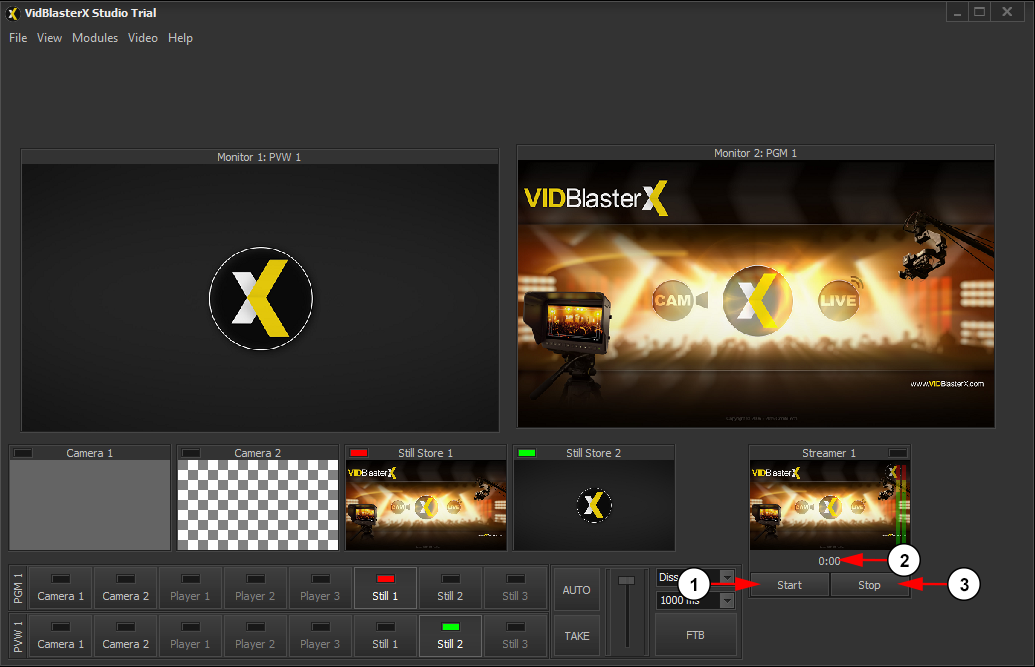
1. Click here to start the stream.
2. Here you can view the counter that shows you how long you were streaming live.
3. Click here if you want to stop the stream.