In Events page you can add and edit events that will be displayed on the website.
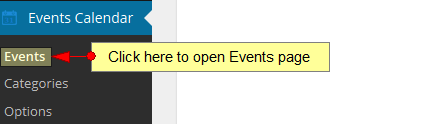
Click on Events link under Events Calendar chapter, in order to view the page:
This is how the page looks like and we will explain each option. In the first section of the page you can see the Add Event area:

1. Click here to insert the event title.
2. Insert here the location of the event.
3. Insert here a description of the event.
4. Click on the drop down list and select a category which you want the event to be assigned to.
5. Insert a link for the event (this field is optional).
6. Click here to select the start date of the event.
7. Check the radio button if you want the event to be recurring or not. If Yes radio button is selected, Recurrence patterns section will be displayed ad you can see in picture above.
8. Check the radio button to select the desired recurrence pattern: daily, weekly, weekly on a specific week of the month, monthly, yearly.
9. Select from the drop-down menu the number of days you want the event to recur.
Note: depending on the selection made at no.8, this section will be different. You can select the number of weeks, months or years and also a specific day of the week.
10. Check this radio button if you don’t want to select an end date for the event.
11. Check this radio button if you want the event to end after a number of occurrences.
Note: 1 recurrence means 1 complete recurring pattern.
12. Check this radio button if you want the event to end before a fixed date. Insert the date in the field.
13. Insert here the start time of the event.
14. Insert here the end time of the event.
Once your settings are adjusted, click the Save button and the event will be added in the Manage Events list.
This is an example of a Calendar page on the website, on Simple One theme:

1. Click here to open Calendar page.
2. Click here to go to the previous month.
3. Here you can see the current month.
4. Click here to go to the next page.
5. Here you can see the current day – it is marked with blue.
6. Here you can see the name of the schedule event.
Note: hover the mouse over the event name and the event details will be displayed.
7. Here you can see the time of the event.